Difference between revisions of "LackRack"
From Eth0Wiki
(Presenting: The LackRack) |
m |
||
| Line 1: | Line 1: | ||
= The LackRack = | = The LackRack = | ||
| − | First occurence on [[Eth0:2010_Winter|eth0:2010 Winterlan]], the LackRack is the ultimate, low-cost, high shinyness solution for your datacenter-in-the-living-room. Featuring the [http://www.ikea.com/us/en/catalog/products/40104270 LACK] (side table) from Ikea, the LackRack is an easy-to-implement, | + | First occurence on [[Eth0:2010_Winter|eth0:2010 Winterlan]], the LackRack is the ultimate, low-cost, high shinyness solution for your datacenter-in-the-living-room. Featuring the [http://www.ikea.com/us/en/catalog/products/40104270 LACK] (side table) from Ikea, the LackRack is an easy-to-implement, exact-fit datacenter building block. |
= Summary = | = Summary = | ||
Revision as of 21:02, 18 January 2010
Contents
The LackRack
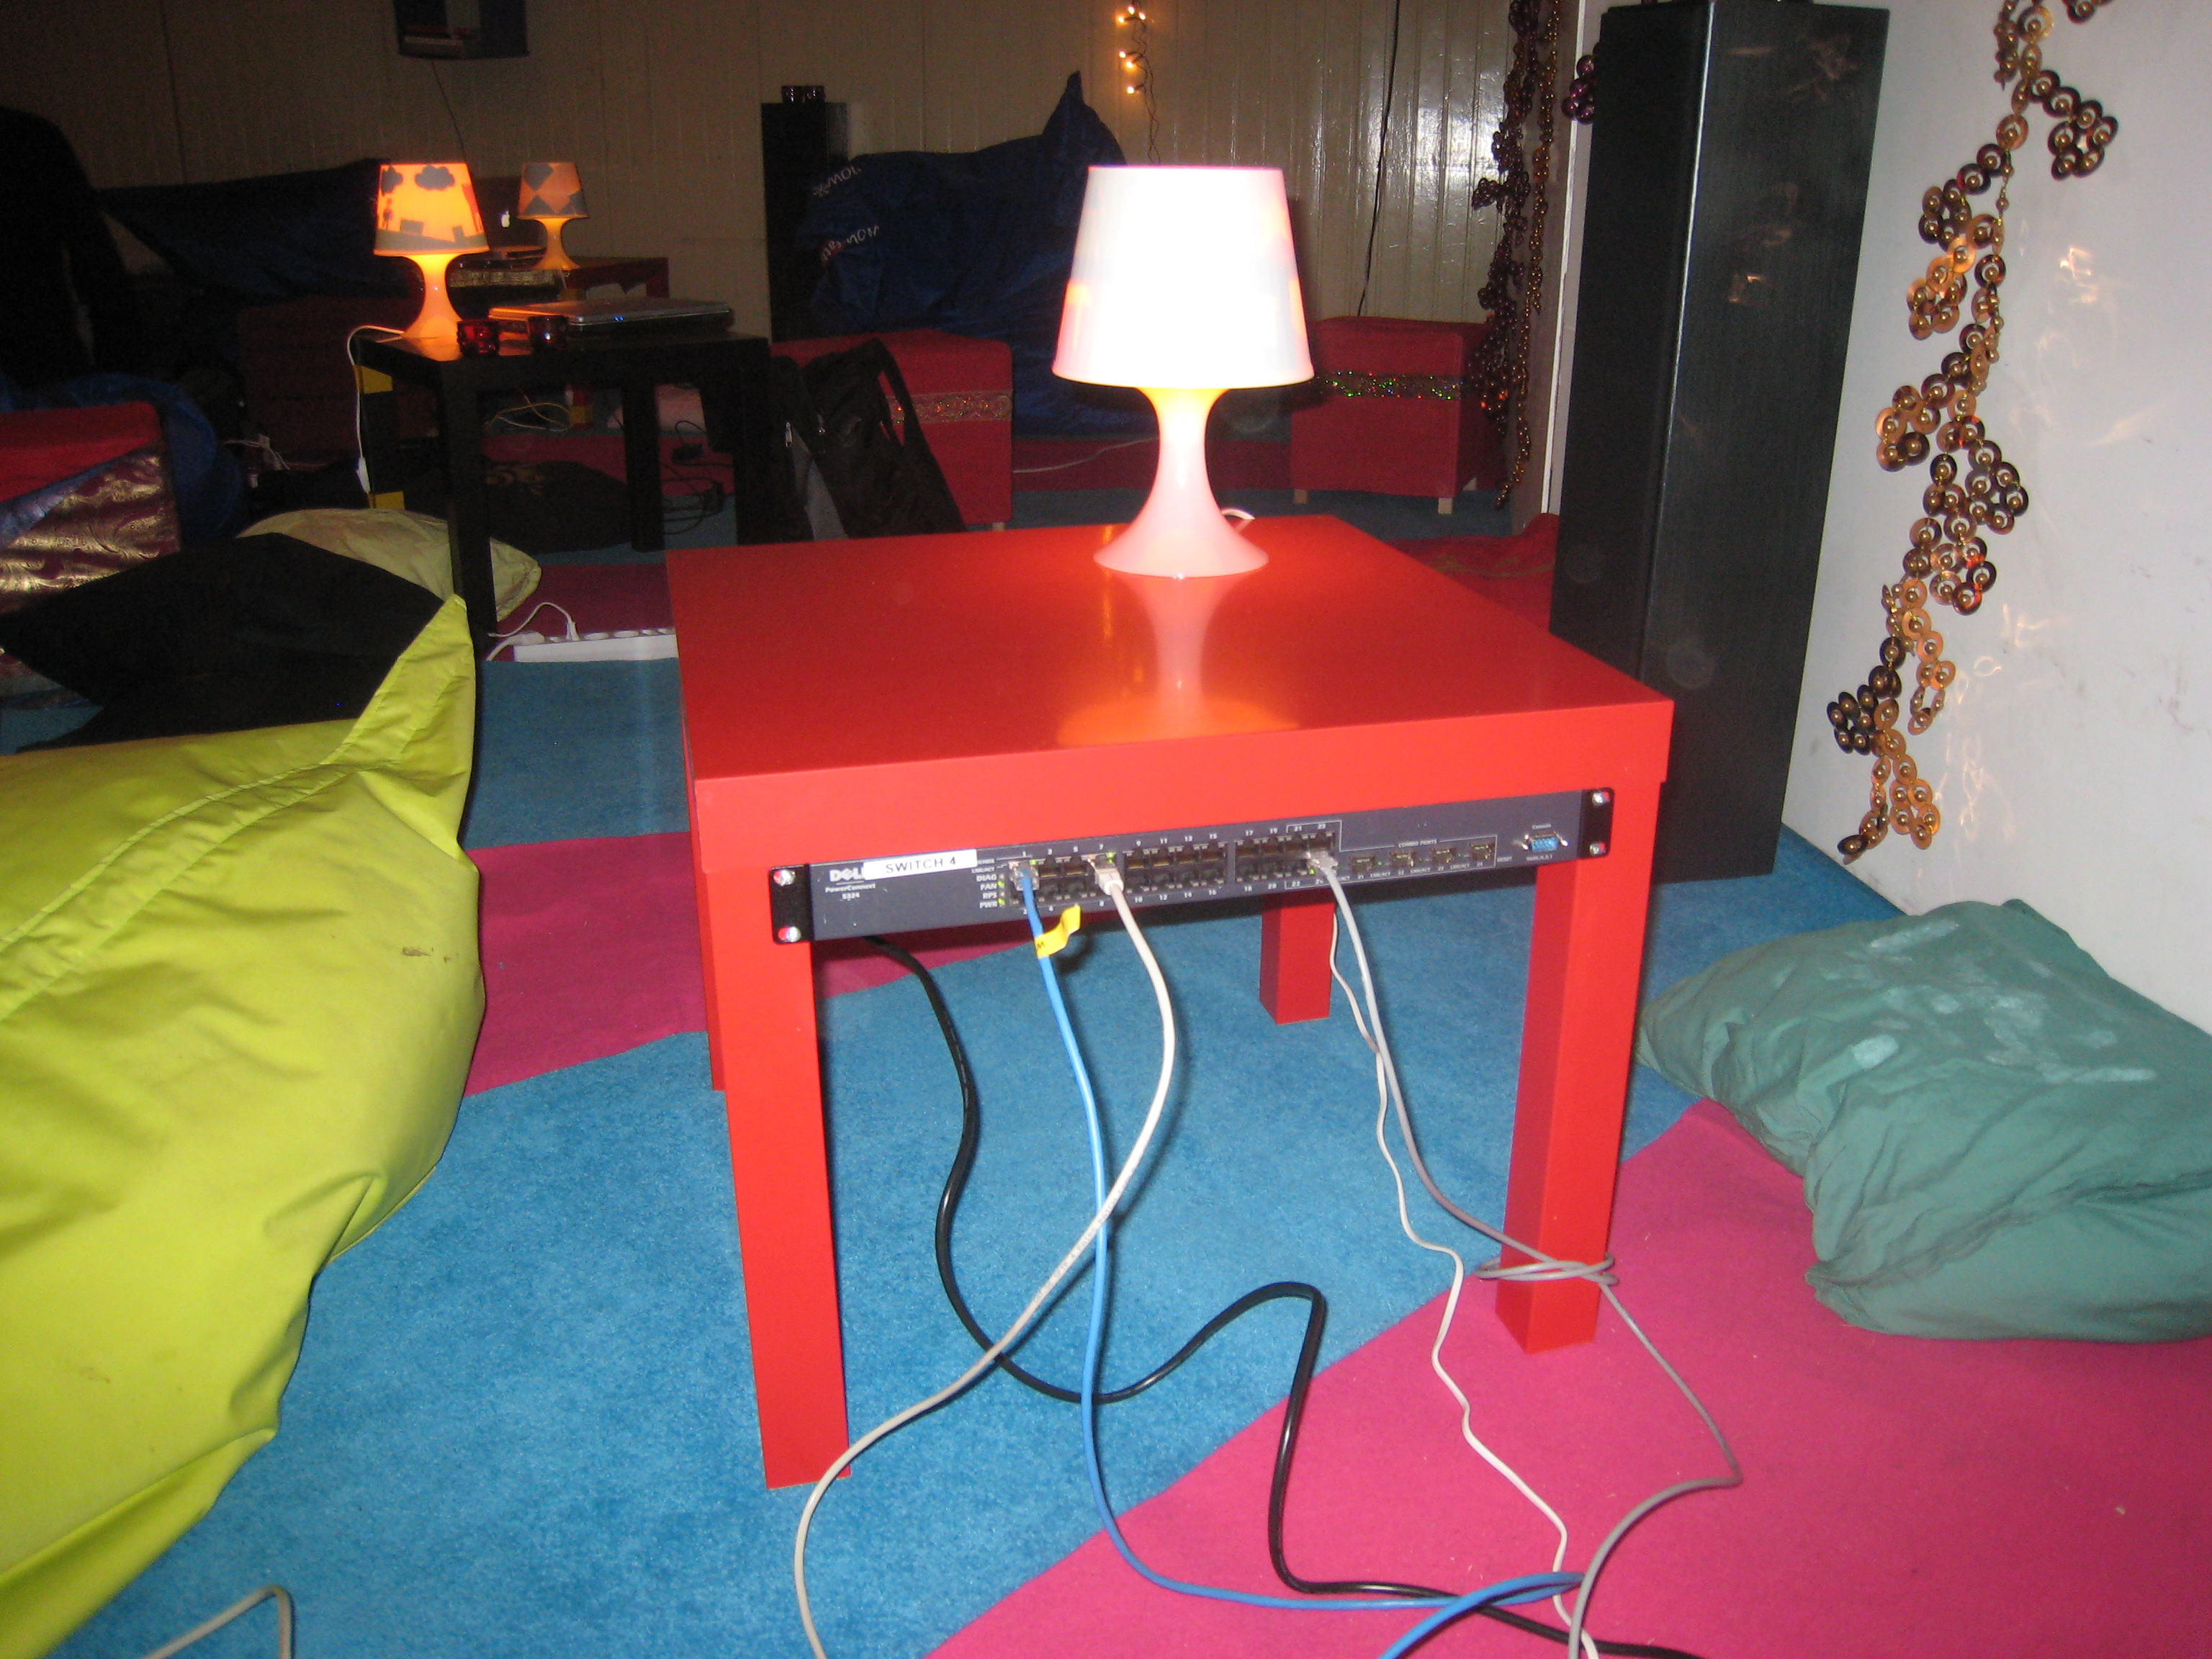
First occurence on eth0:2010 Winterlan, the LackRack is the ultimate, low-cost, high shinyness solution for your datacenter-in-the-living-room. Featuring the LACK (side table) from Ikea, the LackRack is an easy-to-implement, exact-fit datacenter building block.
Summary
The LackRack was first seen on eth0:2010 Winterlan in the no-shoe Lounge area. Its low-cost and perfect fit are great for mounting 19" hardware, such as switches (see below), or perhaps other 19" gear. It's very easy to assemble, and thanks to the design, they are stable enough to hold (for example) 19" switches and you can put your bottle of Club-Mate on top! Multi-shiny LackRack can also be painted to your specific preferences and the airflow is unprecedented!
Assembly
For assembly in terms of a programming language, this is not the page you need.
However, in order to assemble the LackRack, there are a few prerequisites or tools that are needed:
- 1 (or more) LACK side table from Ikea
- Screwdriver (whether muscle-driven or motor-driven, with preference of the latter)
- Screws (they should fit in the rack mounts on your appliance)
- Spare time
That's all! First, follow the assembly instructions in the Ikea manual in order to assemble the LACK. After that, the installation of your 19" hardware can begin.
Installation
Installing hardware in your LackRack is easy!
- Put the table on its side (which one is your decision)
- Mount the hardware between the left and right leg
- If you mount the first item, it is recommended to install it against the table top for good fit
- Screw all the screws that fit in the rack mount in the left and right leg (for stability)
- Profit!
Goodies
- You can put a small lamp on top of the table to see your hardware
- The table can be painted in a color of your preference
- That means, no more dull black/gray racks!
- Cheap!
- Easy!
- Looks good!
Specs
As from the Ikea product page:
- Product information
- Key features
- Easy to assemble.
- Low weight; easy to move.
- designer:
- IKEA of Sweden
- Product dimensions
- Length: 55cm (21 5/8 ")
- Width: 55cm (21 5/8 ")
- Height: 45cm (17 3/4 ")
- About 9U of rack space
- care instructions
- Wipe clean using a damp cloth and a mild cleaner.
- Wipe dry with a clean cloth
- product description & measurements
- Top: Particleboard, Fiberboard, ABS plastic, Printed and embossed acrylic paint, Clear acrylic lacquer
- Filling material: Paper
- Leg: Particleboard, Fiberboard, Foil, Foil

